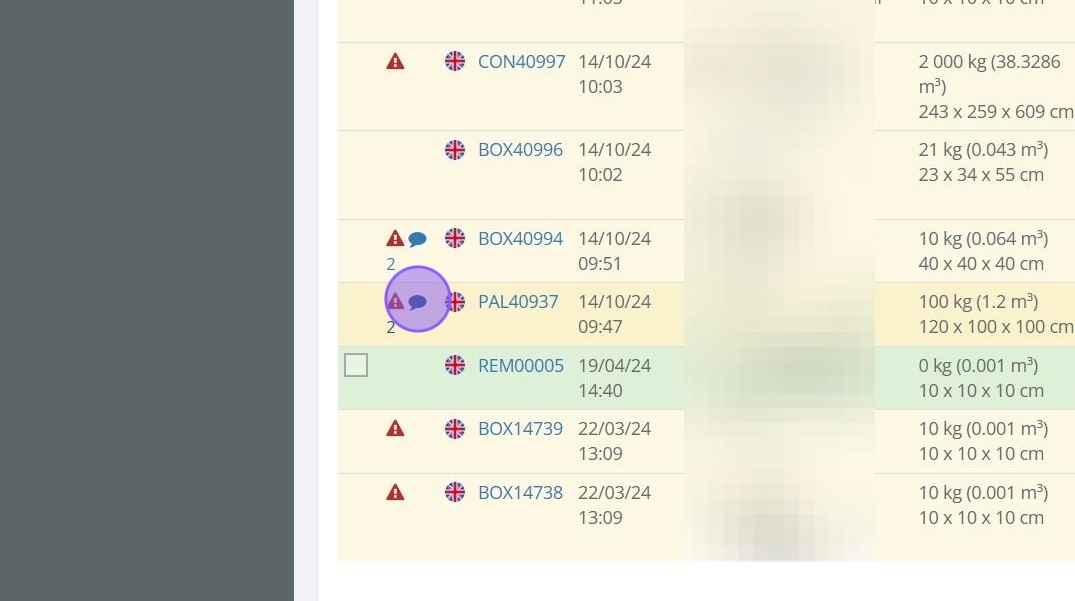
1. Here you will see a full list of inbound orders that you have created or have been added for you when we received it. Information available on this page includes any warnings, country with a flag, creation date, reference (with tracking number and courier), weight and size, status of the inbound order, quantity, and actions to view full details or add services.
2. Navigate to the main "Inbounds" section where you can see the full list.

3. Click "All inbounds"

4. In this section, you’ll see key information, including:

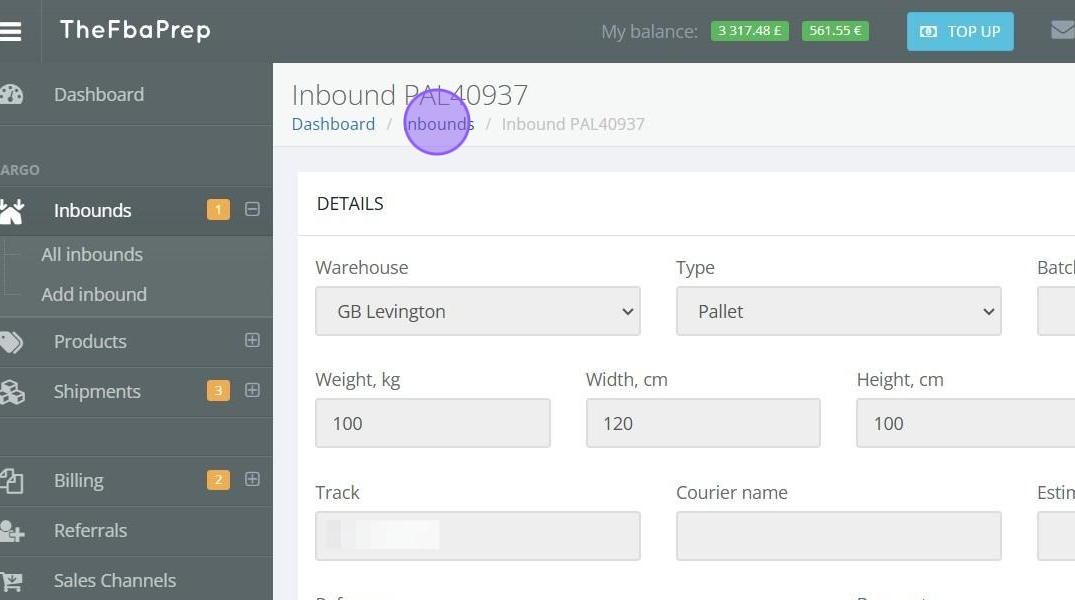
5. Click on an inbound order ID to see complete details.
Each inbound order type is identified with a prefix:

6. From here you can see detailed information of inbound order, such as:
You can also order services directly from this page, depending on the inbound order type, as each type has specific services available.

7. To go back to the main list of inbound orders, click the “Inbounds” button. This will take you back to the “All Inbounds” section.

8. A red warning icon will show any issues with an order. Click on the warning icon to learn what actions are needed.

9. A pop-up window will show up describing the issue with the order

10. Click the comments icon to open a detailed page where you can see all comments from the team or add your own. To go back to the main list, click the “Inbounds” button.
11. It will take you to a detailed page with comments, where you can post them and read comments from our team.

12. To go back to the main list of inbound orders, click the “Inbounds” button.
13. Use the quick action icons in the All Inbounds list to view details or add services.

14. To create a new inbound order, click on “New Inbound.” This will take you to the “Add Inbound” page. For more guidance, check our guide on how to create an inbound order

15. You can create a shipment from one or multiple inbound orders by selecting them.

16. Once selected, the IDs will appear at the top.

17. After confirming the correct selections, click “Create Shipment” to go to the Manual Order page. For more details, see the guide on shipment creation [include link here if available].
