
Tip: Open the Excel file and fill in the following details:
Save the filled template
2. Import the saved inbounds template into the system
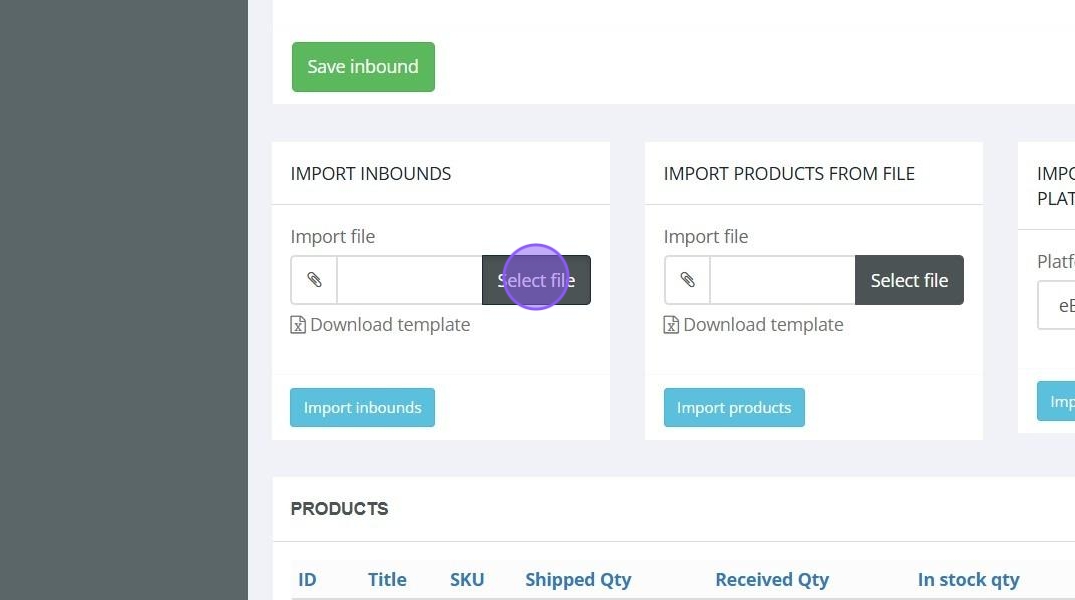
3. Click "Import inbounds"

4. Download the products template

Tip: Open the Excel file and fill in the following details:
You can find detailed description of what is required in the "Explanation" sheet within the file.
Save the filled template
5. Click "Select file"

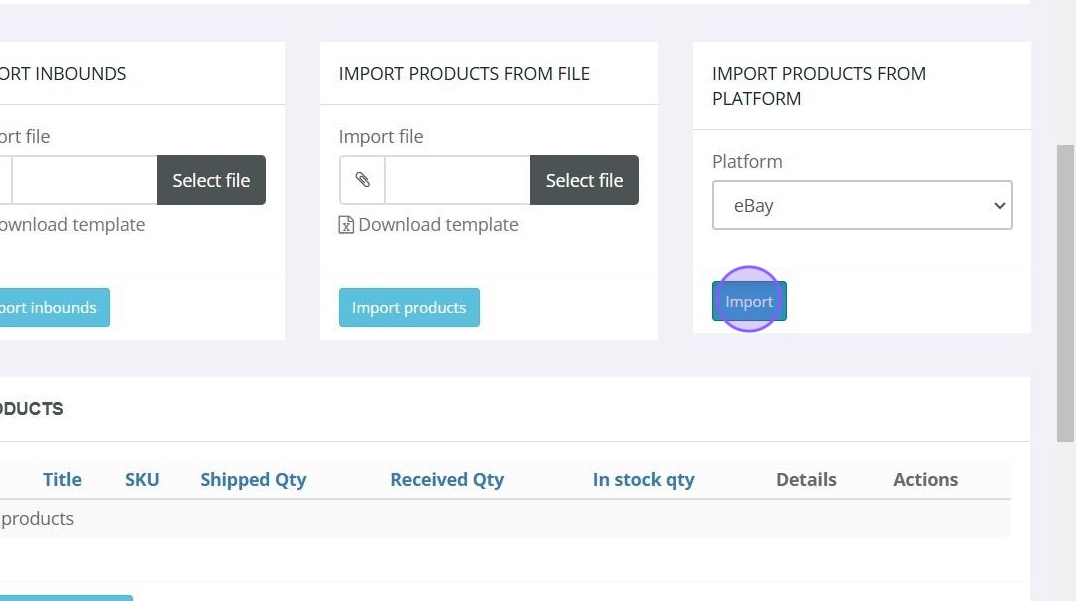
6. Import the saved products template into the system

7. Import products from connected platforms

8. Click "Import"
9. Add new product to inbound shipment

10. Add SKU: Add a new SKU (Stock Keeping Unit), choose from saved SKUs, or create a rule for generating SKUs. If you don't have a SKU, provide information that will help us distinguish the product.

11. If you had this SKU already you can click Find and fill and it will automatically populate all the necessary fields.

12. Product Title: Enter the product title, which will be reflected on the FNSKU label.

13. Color, Size, Variation: Provide details about the product's color, size, and variation, if applicable.

14. Value: Value of the single product.

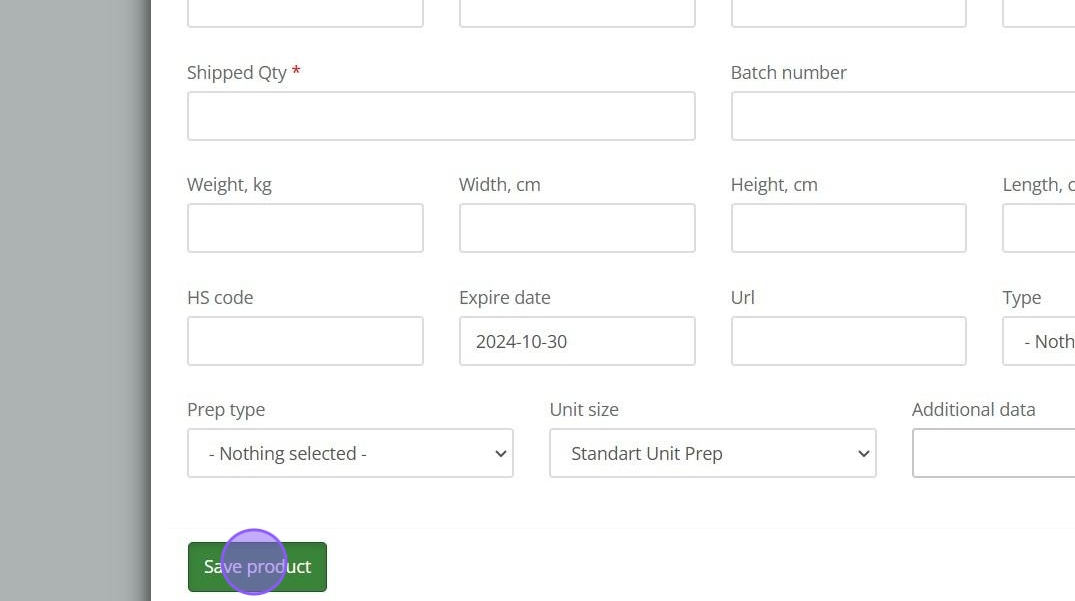
15. Quantity: Specify the quantity of the product.

16. Batch Number: Enter the batch number for the product.
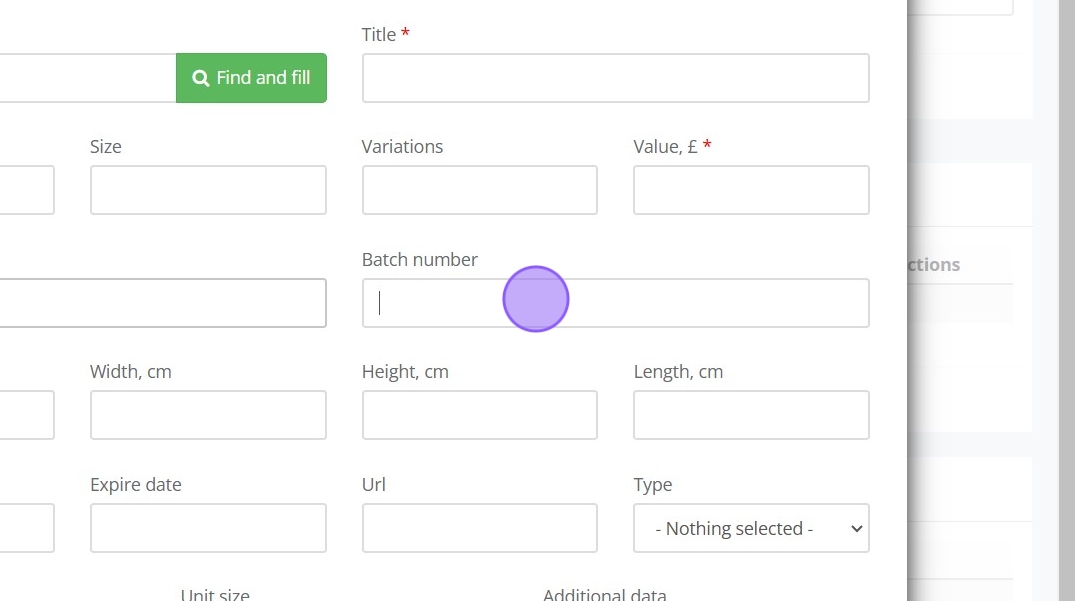
17. Dimensions: Provide the product's dimensions.

18. HS Code: If shipping abroad, provide the HS Code (Harmonized System Code).

19. Expire Date: Enter the product's expiry date, if applicable.

20. Product URL: Provide a URL to your product page.

21. Product Type: Specify the type of product (e.g., clothing, electronics, sports equipment).
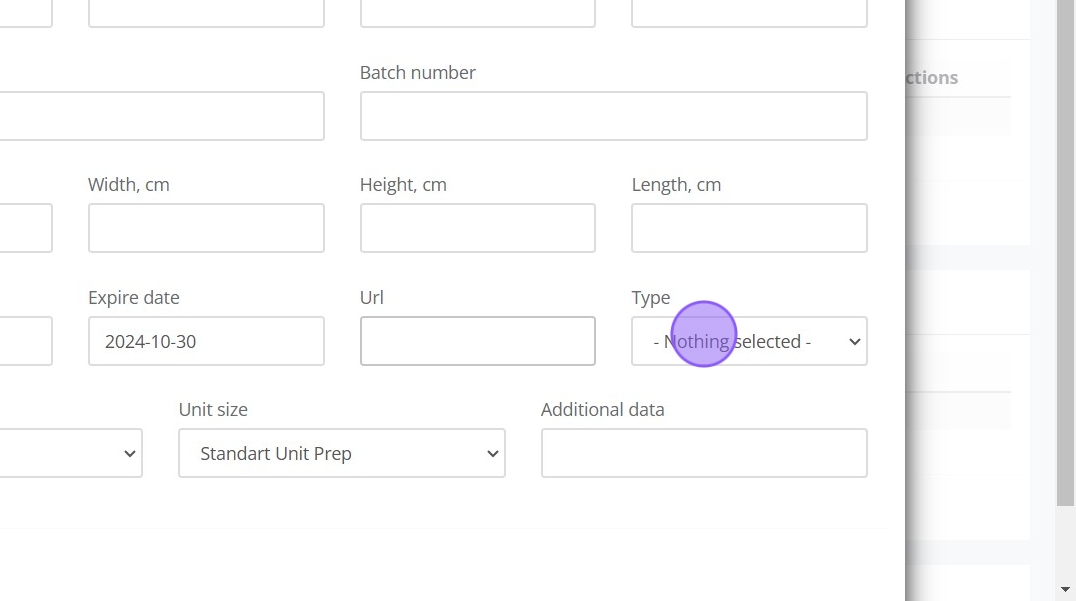
22. Preparation Type: Select the required preparation type, such as bubble wrap or poly bagging.

23. Unit Size: Specify the unit size for preparation (single unit, bundle, small item, large item).

24. Additional Data: Add any other relevant information about the product.
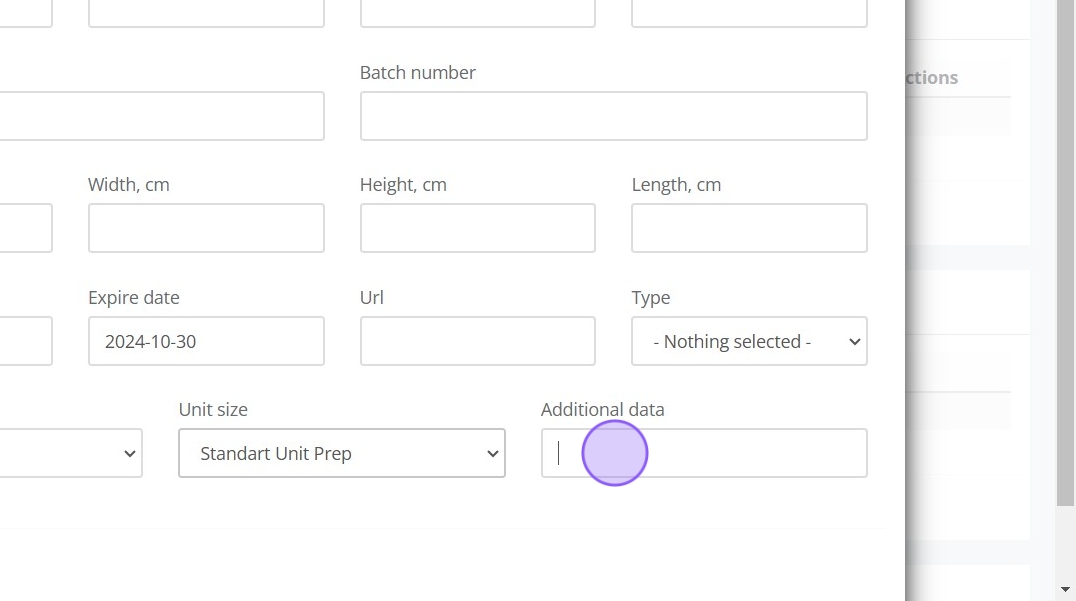
25. Click "Save product"
26. Click "Order service"

27. Select service type. Based on inbound type there will be different option for each of them.
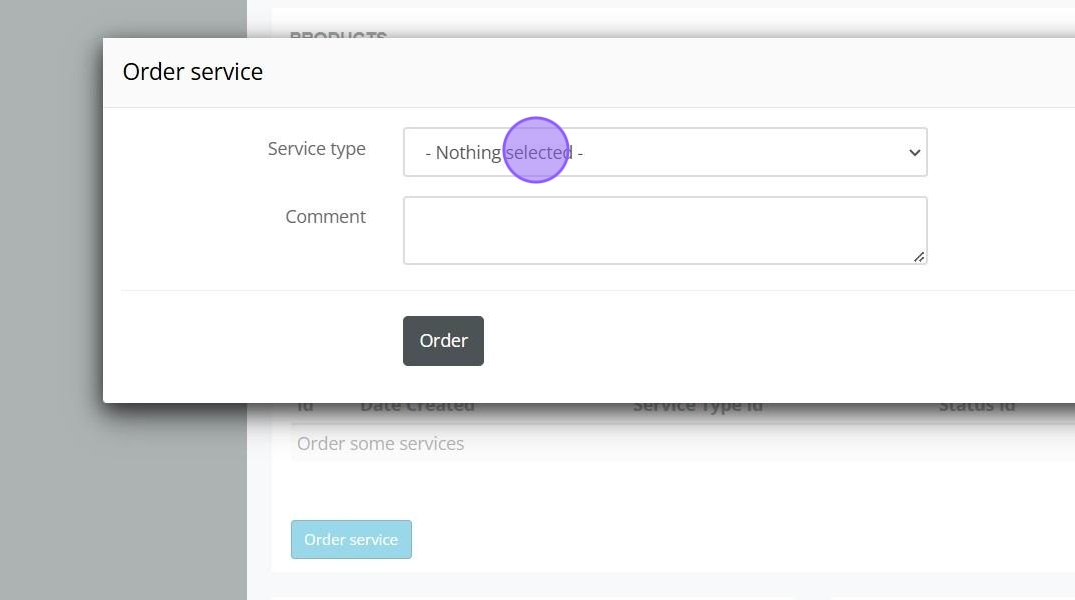
28. Provide any comments for this service to our warehouse staff

29. Click "Order"

30. Provide comments for this inbound shipment.

31. Click "Save"

32. Upload documents (e.g., photos, documents) for the shipment
Click "Select file"

33. Print labels from the system

34. Here you can see history of this inbound shipment and errors. This is more for the future when this inbound is actually created
